How to Floss with Braces: Tips from Orthodontics Experts

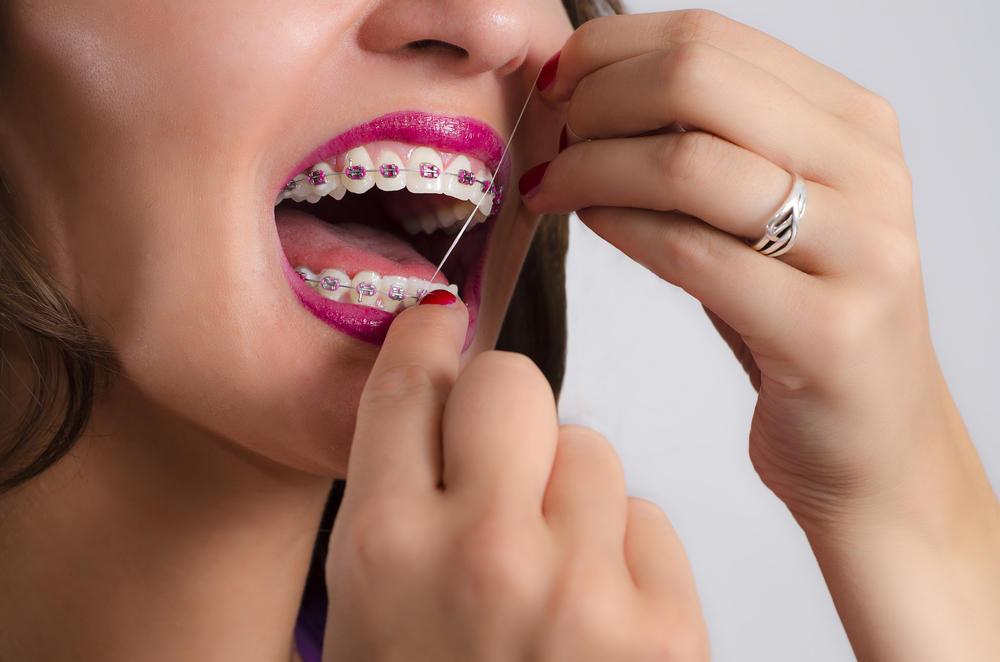
Flossing with braces requires a floss threader. Thread floss above the wire, guiding it between teeth, and gently move it back and forth. Glide it along the gum line to remove plaque and food debris. Repeat between each tooth and under the wire for thorough cleaning. This routine helps keep your teeth clean and prevent issues like gum disease during orthodontic treatment.

Key Takeaways

  • Flossing with dental braces is important. It prevents cavities, gum disease, and white spots on teeth caused by plaque buildup.
  • Choose the right tools: Waxed floss, floss threaders, superfloss and water flossers all work well with braces.
  • Be patient and gentle. Flossing with braces takes more time than without. Don’t force the floss or you could damage your braces or gums.
  • Floss at least once a day. Ideally, floss after meals and before bed.

Step By Step Instructions For Flossing With Braces

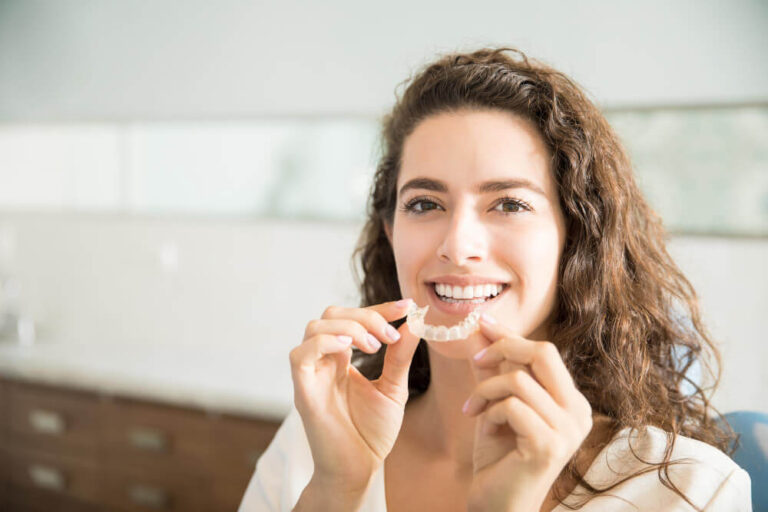
Interested to know how to keep your teeth clean, even with all those brackets and wires from your orthodontic treatment?

Here are the step-by-step instructions and flossing techniques for patients with braces:

Step 1: Choose the Right Floss

  • Opt for waxed floss or a floss threader. Waxed floss is less likely to catch or tear on braces, and a floss threader can help in threading the floss behind the wires.

Step 2: Prepare the Floss

  • Cut a piece of floss about 18-24 inches long.
  • If using a floss threader, thread about 5 inches of floss through the eye of the threader. This tool acts like a needle, helping you guide the floss through the wires of your braces.

Step 3: Threading the Floss

  • Insert the end of the floss threader under the archwire of your braces.
  • Pull the floss through until you can hold each end comfortably in your hands. Be gentle to avoid snapping the floss onto the gums.

Step 4: Flossing Technique

  • Wrap the ends of the floss around your index fingers for better control.
  • Gently insert the floss between two teeth and slide it up and down along the side of each tooth, forming a “C” shape as you wrap the floss around each tooth. Move it beneath the gum line, but do so gently to avoid irritating the gums.
  • Use a clean section of floss for each tooth to avoid reinserting bacteria and food particles.

Step 5: Removing the Floss

  • Carefully pull the floss out from between the teeth and from under the wires. Use the same back-and-forth motion to avoid pulling on the wires of your braces.

Step 6: Repeat for Each Tooth

  • Repeat steps 3 to 5 for each tooth, including the back sides of the last molars.

Step 7: Rinse and Inspect

  • After flossing, rinse your mouth with water or a fluoride mouthwash to remove any dislodged particles and plaque.
  • Inspect your teeth and braces in the mirror to ensure there are no remaining food particles.

Additional Tips

  • Floss at least once a day, preferably at night, to ensure your teeth are clean before bed.
  • Be patient and gentle. Flossing with braces takes more time and care than flossing without braces.
  • If you find traditional flossing challenging, consider using specialized orthodontic flossers designed for braces, which can simplify the process.

How to Floss with Braces with Threader

Here’s a guide on how to effectively floss with braces when using a floss threader:

Materials:

  • Floss threaders: These are small, needle-like plastic tools with a loop to hold the floss. You can find them at most drugstores.
  • Dental Floss: Choose waxed or unwaxed floss based on your preference. Waxed floss slides between teeth more easily.

Steps:

  • Prepare the threader: Break off a generous length of floss (around 18 inches). Thread the floss through the loop on the floss threader.
  • Insert the threader: Gently guide the pointed end of the threader underneath the archwire of your braces, between two teeth. Make sure the loop is halfway under the wire.
  • Pull the floss through: Hold onto the floss on one side of the threader and carefully pull the threader through the space, bringing the floss underneath the archwire.
  • Floss normally: Once the floss is beneath the wire, remove the threader and floss as you normally would.
  • Hold the floss against the side of one tooth, forming a “C” shape, and gently slide it up and down, reaching beneath the gum line.
  • Repeat with the adjacent tooth.
  • Repeat for each gap: Continue using a new floss threader to reach the space between each pair of teeth.

Tips:

  • Go slowly: Don’t force the threader or floss as you could damage your braces or gums.
  • Be thorough: Take your time with each tooth, ensuring every surface is cleaned.
    Angle for tight spaces: It might be helpful to angle the threader slightly to reach into tighter spaces.
  • Use superfloss: An alternative is superfloss, which has a built-in stiff end for threading under the archwire, followed by spongy floss for effective cleaning.

Additional Considerations

  • Flossing frequency: Orthodontists recommend flossing at least once a day with braces.
  • Bleeding: Some bleeding is common when you start flossing with braces. If it persists for longer than a few days, consult your orthodontist.
  • Alternative tools: Water flossers are a great alternative if you find traditional flossing difficult with braces.

How to Floss with Braces without Threader

Here’s how you can floss with braces without a threader:

The Technique:

  1. Prepare the floss: Take an 18-inch strand of floss. Waxed floss may slide more easily.
  2. Thread the archwire: Carefully guide one end of the floss over or under your archwire, between two teeth. It might help to make one end slightly stiffer by wrapping it around your finger. Be patient and gentle to avoid bending the wire.
  3. Form a “C” shape: Gently slide the floss between your teeth. Wrap the floss around the side of one tooth, creating a “C” shape.
  4. Floss as usual: Slide the floss up and down from the gum line to under the contact point between the teeth. Use a gentle sawing motion to avoid snapping the floss.
  5. Repeat on the other tooth: Repeat step 3-4 for the adjacent tooth.
  6. Continue throughout the mouth: Move carefully to the next gap between teeth and repeat the process until you’ve flossed all of them.

What Are the Main Types of Floss I Can Use with Braces and What Are the Pros and Cons for Each?

When it comes to flossing with braces, choosing the right type of dental floss can make a significant difference in effectiveness and ease of use.

Here are the main types of floss you can use with braces, along with their pros and cons:

Waxed Floss

  • Pros:
    • Smooth Texture: Less likely to catch or shred against the metal brackets and wires of braces.
    • Ease of Use: Slides more easily between teeth with less friction.
  • Cons:
    • Thickness: Can be slightly thicker than unwaxed floss, which might make it harder to get into very tight spaces between the teeth.

Unwaxed Floss

  • Pros:
    • Feedback: Makes a squeaking sound when the teeth are clean, providing feedback during flossing.
  • Cons:
    • Fraying: More likely to fray or break when rubbing against metal braces, which can be frustrating and less effective.

Dental Tape

  • Pros:
    • Flat Design: Broader and flatter than standard floss, which can be more effective at cleaning the larger gaps that can exist with braces.
  • Cons:
    • Bulkiness: May be too thick for very tight spaces, similar to waxed floss.

Super Floss

  • Pros:
    • Versatility: Pre-cut strands with three components: a stiffened-end threader, spongy floss, and regular floss. Excellent for getting under the wires and cleaning around the brackets.
    • Effective Cleaning: The spongy part cleans around the appliances and under the archwire effectively.
  • Cons:
    • Cost: Generally more expensive than regular floss.
    • Single-Use: Each piece is meant for one-time use, which may not be as cost-effective as a spool of floss.

Water Flosser

  • Pros:
    • Ease of Use: Does not require threading between each tooth, which is a significant advantage with braces.
    • Effective Cleaning: Uses a stream of water to remove food particles and plaque, which can be very effective around braces.
  • Cons:
    • Cost: Initial investment is higher than buying dental floss.
    • Size: More bulky and requires electricity or batteries, making it less portable than traditional floss.

Floss Threaders

  • Pros:
    • Accessibility: Allows any type of floss to be used with braces by threading it through the braces.
  • Cons:
    • Additional Step: Requires an extra step of threading the floss before you can begin flossing, which can be time-consuming.

Each type of floss has its benefits and drawbacks, especially in the context of braces. The choice often depends on personal preference, the specific orthodontic issue being addressed, and advice from dental professionals.

Regular flossing with any of these methods is crucial for maintaining oral hygiene with braces.

How Parents Can Help Children With Braces Floss

To start, select the right flossing tools. A floss threader, for instance, can simplify the task by helping thread the floss under the orthodontic wires.

Orthodontic floss, or ‘super floss’, is particularly useful as it includes a stiff end for easy threading and a spongy part that’s effective at cleaning around the brackets.

Using a water flosser is also an excellent alternative. They are not only fun to use but are also effective at dislodging food particles and plaque, which can be a plus for children who might find traditional flossing too challenging. 

Whether you have braces or not, a water flosser is a good way to keep your teeth clean.

First, demonstrate the correct flossing technique and perform the flossing for your child. This hands-on demonstration can teach them the right way to floss with braces.

Once they start to get the hang of it, you can guide their hands during the process, gradually letting them take more control as they become more comfortable and skilled.

Establishing a regular flossing routine is another key step. Ensuring that flossing occurs at least once a day, preferably before bedtime, helps inculcate it as a daily habit.

To make the routine more appealing, make it fun: use flavored floss, set up a timer, or introduce a small rewards system for consistent flossing.

Is Flossing with Braces Necessary? What Happens If You Don’t Floss with Braces?

Flossing with braces is mandatory for maintaining good oral health throughout orthodontic treatment.

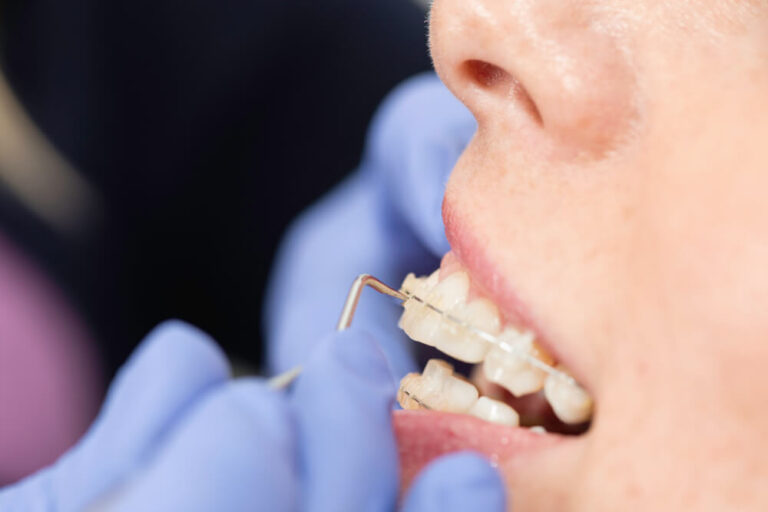
Braces create numerous small spaces that trap food particles and plaque. These areas are challenging to clean with a toothbrush alone, making flossing an essential part of dental care for anyone with braces.

Here are the main consequences of not flossing with braces

Increased Risk of Cavities

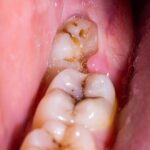
The accumulation of plaque and food particles around the brackets and between the teeth can lead to decay. Plaque is a biofilm of bacteria that feeds on sugar in your mouth and produces acids that erode tooth enamel, leading to cavities.

Gum Disease

When plaque is not removed effectively, it can cause inflammation of the gums, known as gingivitis. Symptoms include red, swollen, and bleeding gums. If left untreated, it can progress to periodontitis, a more serious gum disease that can damage the bones and tissues that support teeth.

White Spots and Lesions

These marks are areas of decalcification where minerals have been stripped from the tooth enamel, often appearing as white, chalky spots. They are typically permanent and can occur around the brackets where plaque has not been adequately removed.

Prolonged Treatment Time

Poor oral hygiene can lead to complications that may extend the time you need to wear braces. Severe decay or gum disease might require additional treatments or adjustments in the orthodontic plan.

Bad Breath

Accumulated food particles and plaque can lead to halitosis, commonly known as bad breath. Regular flossing helps remove the debris that contributes to this condition.

Given these potential issues, flossing with braces becomes an important practice.

Floss at least once a day, though more frequent flossing can be beneficial, especially after meals. Using tools like floss threaders, water flossers, or interdental brushes can also make the process easier and more effective.

Why is Flossing with Braces Hard?

Flossing with braces is challenging because the brackets and wires create numerous small, hard-to-reach spaces where food particles and plaque can accumulate.

These obstacles require additional tools like floss threaders or special techniques to navigate effectively.

The process is more time-consuming and requires greater precision to ensure thorough cleaning without damaging the braces or irritating the gums, making it a tedious task, especially for young people or those new to braces.

FAQ on How to Floss With Braces

What Is the Easiest Way to Floss with Braces?

The easiest way to floss with braces is by using a water flosser, also known as an oral irrigator. This device uses a stream of pulsating water to remove food debris and plaque from between the teeth and around the braces without the need for threading floss under the wires.

Water flossers are particularly effective at cleaning around orthodontic appliances and can reach places that traditional floss might miss, making the process quicker and less cumbersome

Is it possible to floss with braces?

Yes, it is possible to floss with braces, although it requires more time and effort due to the brackets and wires.

Using tools like floss threaders or specialized orthodontic floss can help navigate around the braces effectively, ensuring thorough cleaning between the teeth and along the gum line. Aim to floss daily, to prevent cavities during your orthodontic treatment.

Is It OK to Water Floss with Braces?

Yes, it’s perfectly okay to waterfloss with braces. In fact, water flossing can be an effective and easy way to clean around the brackets and wires, helping to remove food particles and plaque without the need for threading traditional floss. This method is often recommended for its ease of use and effectiveness in maintaining oral hygiene with braces.

How Do You Floss with Braces and Swollen Gums?

When flossing with braces and swollen gums, it’s important to be gentle to avoid further irritation. Using a waxed floss with a floss threader can help navigate around braces smoothly.

Carefully slide the floss between each tooth and along the gum line, using soft, gentle motions. Additionally, consider using a water flosser for a less abrasive cleaning method that still effectively cleans around braces and soothes swollen gums.

Fact Checked

Our dedicated team rigorously evaluates every article and guide to ensure the information is factual, up-to-date, and free of bias.

Updated Regularly

We update our articles and reviews regularly to ensure you have access to the latest data in the dental industry.

Aarav Patel
Aarav Patel

Aarav Patel is an expert in dentistry and orthodontics. He'd been known for his gentle approach and commitment to using minimally invasive techniques to achieve the best outcomes. Now he is 105% involved in Dental3DU, providing insights for visitors who need more dental advice. When he's not working, you can find him taking photos and exploring the great outdoors.

Articles: 30

Get the latest articles in your inbox

Enter your email address below and subscribe to our newsletter

The content on Dental3DU’s blog is intended for educational purposes only. This information should not be relied upon as professional medical counsel. Be sure to always consult with your dentist about the dangers and benefits of any medication, treatment or procedure.